Desaturated High Contrast Effect for Commercial Portraits in Photoshop | Brian Rodgers Jr. South Bend Commercial Photography

hidden Photoshop gem: you can use adjustment layers and simply change the blend mode without having to use the adjustment layer for it’s intended purpose.

In this tutorial I will show you how to get that really cool desaturated high contrast portrait look you see in so many commercial portraits. Now keep in mind, this is only one way to achieve this effect. We start by duplicating the layer twice; press Command + J and Command + J again. Select you first copy (should be your middle layer) and press Shift + Command + U to completely desaturate the layer. Change the opacity of that desaturated layer to 40%. Then turn on your top layer (copy 2) and change the blend mode to soft light (Shift + Option + F). Lastly change the blend mode to about 50% opacity. Keep in mind that each image will be a little different. Now, that’s one way to do it, on to tip #2! 

Tip#2, Now we are going to achieve that same effect using adjustment layers and blend modes. This time, start from your base layer and add a black and white adjustment layer above that. Set the opacity of the black and white adjustment layer to about 40%. Now create a curves adjustment layer above that. Change the blend mode of the curves adjustment layer to Softlight (Shift + Option + F). Now set the opacity of the Softlight adjustment layer to around 50%. Boom, same results achieved. 

So what’s the difference between these two methods? Well, by using adjustment layers instead of duplicating your base layer, you are creating a smaller Photoshop file, thus saving hard drive space. If you have a Photoshop file with a few layers, the first method is just fine. However, when you retouching commercially, chances are, your files will be growing Popeye arms in no time. So working smarter in Photoshop can not only save you time (because your files will run and save faster) you will also save money (takes less hard drive space; consuming less storage and working faster puts more money in your pocket). 


Lastly, this is a hidden Photoshop gem: you can use adjustment layers and simply change the blend mode without having to use the adjustment layer for it’s intended purpose. For example, in this tutorial, I didn’t use the Curves Adjustment Panel to modify the curve in any way shape or form. I simply added the adjustment layer, and used it for a blend mode, which is the same as duplicating a layer and changing the blend mode…the only difference is, adjustment layers are much smaller and rarely add to the size of your Photoshop file. Furthermore, you can use almost any adjustment layer in this manner. You can do the same thing with Bightness/Contrast, Levels, Curves, Exposure, Brightness, Hue/Saturation, Color Balance, Channel Mixer, Color Lookup, & Selective Color, I just tend to stick with curves (personal preference). You may notice that I didn’t mention all of the adjustment layers. Here’s why: When you add a Black and White Adjustment Layer, an effect is automatically applied, you can still change the blend mode, but you cannot use the adjustment layer simply for the blend mode. Same goes for the Photo Filter adjustment layer, as soon as you apply that adjustment layer, it applies an effect automatically, thus changing the image before a blend mode is applied. 

There you have it, two 2 tips in one this week! 

Rock N' Roll!

Subscribe to my Youtube channel here: http://goo.gl/dII9r6


How to Convert White Products to Black Products with Ease in Photoshop | Brian Rodgers Jr. South Bend Commercial Photographer/Digital Artist

Your Photoshop Questions Answered: How to convert a white product into a black product with ease in Photoshop

I had a question come in from Google+ and wanted to answer it in this in this Photoshop tutorial. In this example, I’m using a stock image to demonstrate how to take an object that is completely white, and convert it to black while still retaining all of the original detail. I will also demonstrate how to do the opposite; turning black to white. This technique is very helpful in commercial retouching.

I would also like to add that while this technique works great, every image will react a little differently. I recommend using 16bit high resolution files within ProPhoto RGB color space, in other words you want the widest tonal range possible. Lastly, keep in mind that when you convert white to black, there are characteristics and qualities of light that you need to keep an eye on. White is additive light, black is subtractive light. In the stock image example in the tutorial, the teacher has a white shirt. That white shirt is adding and reflecting light on his skin. So when you convert it to black, his skin seems a little out of place, because a black shirt would create subtractive light from the subject. My advice would be to burn down the areas of skin (using a dodge and burn technique of your choice) near the black shirt. This would create a more believable conversion. I opposite would go for a black shirt being converted to white. I would take the darker areas of the skin, and dodge them a bit to match the quality of light.

I hope this helps, and if you would like to see more Photoshop tutorials, please leave a comment below and subscribe to my youtube channel. 

Color Conversion Retouching Technique with Photoshop CC - Brian Rodgers Jr. Commercial Photographer South Bend

This technique is great for commercial photography retouching. It can be used for product photography, automotive retouching as well as commercial portraiture.

In this tutorial/video, I will show a Photoshop retouching technique that allows you to change a color in an image to a realistic black or white conversion within minutes. This technique retains all of the detail from the previous color, with little to no masking required.

This technique is great for commercial photography retouching. It can be used for product photography, automotive retouching as well as commercial portraiture. A great example of practical uses for this technique: Let's say you shoot images of a product line for a catalogue. Let's say there are 5 identical products, the only difference is the color. Sure, you can shoot all 5 products, line every shot up to make them look identically shot, or you can use the same shot and convert the colors in Photoshop. With some simple adjustment layers you can knock this out in no time, and all of the shots will look identical, whether they are on an e-commerce page, or inside of a printed catalogue.

Also, while we are only focusing on a black and white conversion in this tutorial, keep an open mind and play around with the Hue/Saturation Adjustment Layer, the Selective Color Adjustment Layer as well. You can create other realistic color conversions with these as well.

Please note, that when using the technique with portraits, minor masking may be required. In the first example, we are turning the red dress into black dress and then into white white dress. Since this color conversion technique requires the primary use of the red slider in the black and white adjustment layer, you will see skin tone change as well. Simply mask it out. If you using this technique on a portrait and you want to convert a color such as blue, you more than likely will not have to mask anything out. Because skin tones will be independent of the blue slider (the skin tones are in the red and yellow slider).

Lastly, this technique is a great starting point to adding additional color to your image. Let's say that I wanted to make the dress a dark purple. I can use this technique and convert the dress to black, then add a purple Solid Color Adjustment Layer on top, add a clipping mask so it only effect the black conversion, and change the blend mode of the Solid Color Adjustment Layer to Color. This would create a realistic purple dress (using the right purple of course; in this case a dark purple would be best)

Hopefully this technique helps you the next time you're in a pinch. If you like this tutorial and would like to see more, please leave a comment below, and subscribe to my youtube channel http://goo.gl/M2VOM2. If I get enough interest, I will be more than happy to produce more tutorials in the future.

Thanks everyone!

Indiana Beverage Photography | South Bend Commercial Photographer Brian Rodgers Jr. | Indiana Liquor Photography

consumer beverage photography. Indigo H20 water bottle hero shot with water splash

I'm commercial photographer and digital artist Brian Rodgers Jr. I'm the founder of commercial photography studio Digital Art That Rocks, LLC. based out of South Bend, Indiana. I specialize in product and beverage photography. If you make awesome products, then I'd like an opportunity to professionally photograph them for you business.

Brian Rodgers Jr. | Commercial Photographer/Digital Artist | Digital Art that Rocks LLC
www.digitalartthatrocks.com | Contact Brian
Instagram | Youtube

The Path to a Career in Photography in 2014 | Brian Rodgers Jr. South Bend Commercial Photographer

Think Big©2013datr.jpg

#1 Never Stop Learning.

Learning new things and acquiring more skills are an essential key to success in this industry. We are seeing an exponential growth in technology, and things are always changing. Knowledge is power. Knowledge is a competitive edge. You can also take the tools you currently own a lot farther when you know how to use them. Sure, you can buy a ton of gear that you may or may not use and dig yourself into debt. Or you can buy gear as you grow and can justify the reason why are you are buying a piece of gear. Just remember this: know your gear. Know it’s strengths and weakness. You can shoot a ring with a kit lens and make other photographers think you used a macro lens when used right. You can shoot an Astin Martin with a $10 Home Depot light and make it look amazing. It's not the gear that makes you a better photographer. It's the knowledge, experience and creativity behind the lens that makes the difference. So don't think for a minute that simply owning a $25,000 pro body camera means your a professional photographer. There are way too many of those people in this industry. Just remember that some of the most iconic images were taken with a camera, a lens, and a light. That’s it.

#2 Clearly Define and Set Your Goals

What are you looking to get out of photography? Are you a hobbyist who simply wants to get better? Are you an aspiring pro choosing to be a contender in this giant boxing ring we call the photography industry? Be prepared to be knocked down a few times. By clearly defining your goals, create a roadmap on how to achieve those goals. Take it one step at a time. Success does not happen over night. Sometimes it takes years. If you’re not by nature, an organized person, I recommend trying Evernote to stay on top of things. The main takeaway is to map out your goals, keep them in front of you, and work on achieving them one at a time. 

#3 Self Assignments

Self assignments and experimentation are key for developing you new skills, a unique vision and your own personal style. This is also going to help you land the type of work you would like to do in the future. Not sure what you like to shoot? If you’re a beginner, shoot anything and everything. Find out what it is that you really love to shoot. This may take a year or two of shooting experience to find out, depending on the amount of work you are allowing yourself to do. Once you find out what it is that you love to shoot, shoot that subject over and over and over again. By repeating the process you will eventually become an expert at it. Maybe you want to be a niche photographer. Maybe you love mountain biking. Take the insight that you have about mountain biking and apply it to creating compelling shots that nobody is shooting. Become an expert in shooting mountain bike product photography, or create unique lifestyle shots of mountain bikers in extreme situations. Whatever it is, find a niche and create the best work you can. Your ultimate goal is to create a body of work that is unique and reflective of the type of work that you do in terms of subject matter and style. You can’t be an expert shooter at everything. As the old saying goes “Jack of all trades, master of none.” Personally, I’d rather master something than be a jack of all trades...

#4 Create an Online Portfolio.

Having your own website will look way more professional than having a free Facebook page. This will also give you access to an email address with your domain name. You can also use sources like 500px.com and behance.com and ultimately lead them back to your website. Show only your very best work. I wouldn't recommend putting work in your portfolio that you don't enjoy shooting. For example, if you shoot high school senior portraits, but don't particularly enjoy shooting family portraits, don't put family portraits in your portfolio. Now you might shoot family portraits every now and then, but if you want to market yourself as a senior portrait photographer, show senior portraits, not family portraits. Your portfolio should be a reflection of what you love to shoot and what you’re great at shooting. Part of having a great online portfolio is to be a great editor of your own work. Choose only the very best shots, and don’t oversaturate your website. If you have doubts about an image, don’t show it.

#5 Networking & Resources

Get Social! Use Linkedin,Twitter, Facebook and Google Plus to help create awareness of you and your brand. (Side Note: If you are just starting out, you don’t have a brand. Don’t even worry about your brand. Just focus on the craft of photography. Know your camera. Know your lights. Create a body of work before you worry about a brand.) The key here is to use these social platforms to drive traffic back to your website. Resources. You're not going to be an expert in everything. That's why it's extremely important to have great vendor resources/relationships. Logistically speaking, knowing where to go to hire models, makeup artist’s, and where to get props makes your job much easier, and visually demonstrates to your client that you can logistically pull a job off. Know how to get things done. Get to know experts in other fields. Genuine relationships with people who are great at what they do can make you look better in the marketplace. You can refer them, and they can refer you. It’s a win win. I think, knowing people with skills outside of yours and having great vendor relationships, is just as important in your career as anything. 

Other Things to Consider

When looking for a job, what skills can you bring to the table outside of your photography skills? Are you a great retoucher? Are you also a great designer? Are you super organized? Do you have great ideas? Can you come up with awesome concepts? These are all things to consider when looking to be hired by a company either as a freelancer, or potential employee. Another thing to consider is this: People want to work with people that they like. You could be the best photographer in the world, but if you’re an asshole, nobody will want to work with you. Period. Respect peoples time, be honest, be genuine, be yourself.   

Disclaimer

There is no one way track to success in photography. Going to college does not guarantee success. Being the best photographer in the world doesn’t guarantee success. Sometimes it comes down to luck, and being at the right place at the right time. But I can say this, taking these tips and putting them to practice will give you a much better chance at success. You can’t just sit around and expect things to happen. I think these ideas are great starting points for someone looking to start or grow their career in photography, or any creative profession for that matter. It takes time and a lot of hard work. You may work a retail job for 10 years before you find success in a creative profession. "There is a 100% chance that you will be rejected” as Joel Grimes would say. And it’s absolutely true. You may hear the word “no” a thousand times before you hear a “yes." You just have to keep that drive, make contacts, and work toward your goals and essentially figure out what “success” really means to you. 

If this information helps you, please leave a comment below and share this link with your friends. I wish you the best of luck on your adventure 

I highly recommend trying Evernote! It's the one app I can't live without. Evernote makes it easy to remember things big and small from your everyday life using your computer, phone, tablet and the web.

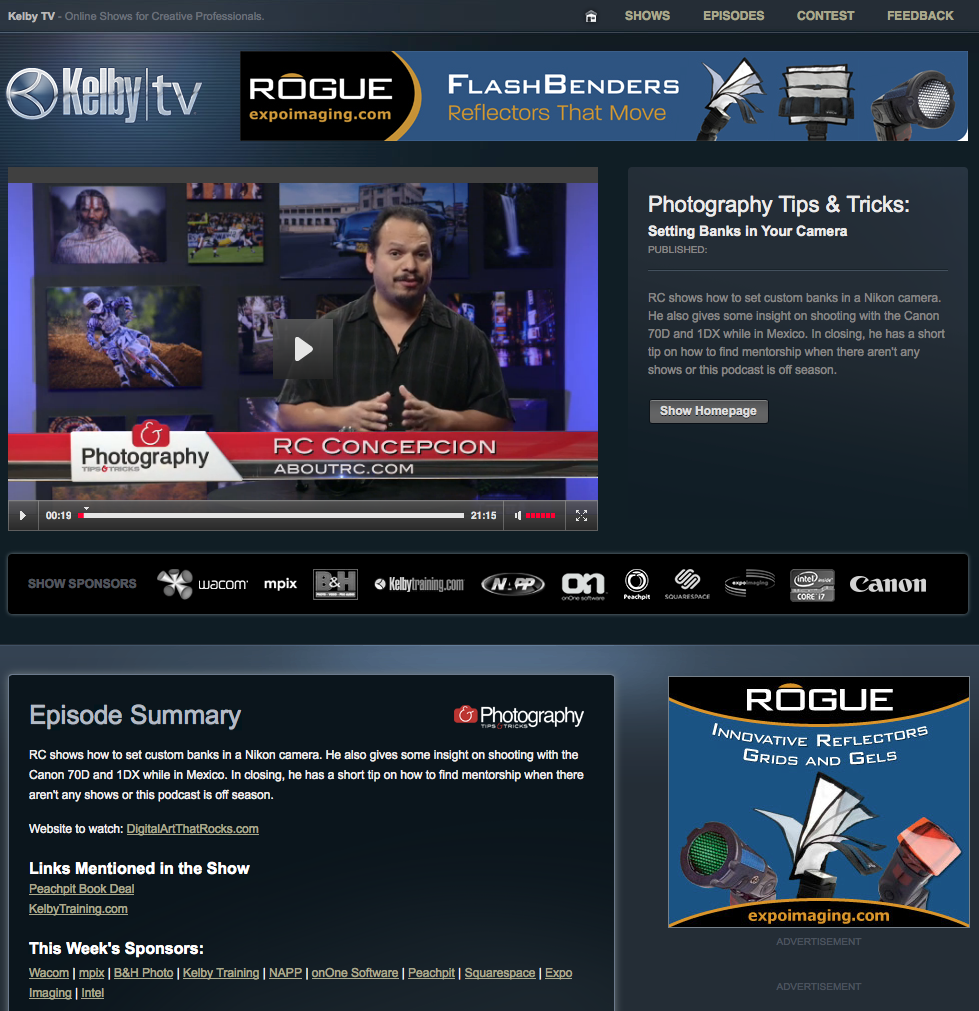
Digital Art that Rocks.com featured on Kelby Media's Photography Tips & Tricks! | Brian Rodgers Jr. South Bend Commercial Photography

This week I was featured on Photography Tips & Tricks by Kelby Media

I was just told this week that I was featured on Photography Tips & Tricks by Kelby Media! My website www.digitalartthatrocks.com was featured as the "website to watch." Truly honored to say least. I'd like to give a quick shout out to my buddy Pete Collins and RC Concepcion for featuring my work on the show. You guys rock! My website can be seen on this episode at (18:58).

The episode I'm featured on is called "Setting Banks in Your Camera | Photography Tips & Tricks". You can view the episode here on my website on the youtube video posted above or the the Kelbytv website: http://kelbytv.com/photographytnt/2013/12/13/setting-banks-in-your-camera/ 


You can see some of Pete Collins' work at http://petecollins.com or follow him on twitter @PeteCphoto

You can see some of RC's work at http://www.aboutrc.com or follow him on twitter at @aboutrc

Thanks again guys!!!

Photography Tips & Tricks | Setting Banks in Your Camera

Pete Collins

Raphael Concepcion (RC)

Animated Gifs for Commercial Photographers | South Bend Commercial Photography

Animated Gifs for Commercial Photographers | South Bend Commercial Photography

Ahhh, animated Gifs. Gotta love them right? Usually funny animations or clips from movies first come to mind. But as a commercial photographer and retoucher, I think it's a valuable way to illustrate to colleagues and clients alike, the steps that are involved in creating an impactful image. I recently found great article on how to create animated gifs and decided to give it a try. I highly recommend checking out Brian Dalessandro's Blog:

Google Drive for Commercial Photographers | Brian Rodgers Jr. South Bend Commercial Photography

Google Drive for Commercial Photographers | Brian Rodgers Jr. South Bend Commercial Photography

This is the beginning of a new Google Series that I will be writing about. This series of articles will talk about how I use Google services as a commercial photographer based in South Bend, Indiana. Please note, that I am not being paid by Google to sell services, these articles will be derived from an informational standpoint stemmed from my own thoughts and opinions on how I use these services in my own personal workflow as a commercial photographer. Lastly, in order to use these services, you will need to sign up for a free google account, if you already have a gmail account, then you have a google account. 

GOOGLE DRIVE FOR COMMERCIAL PHOTOGRAPHERS

Let's start off by talking about what Google Drive is. Simply put, Google Drive a free cloud storage service that lets you store and access your files anywhere, on the web, on your computers hard drive, or on your mobile device, by downloading Google Drive app and using your Google Account. You can also go to https://support.google.com/drive/answer/2424384?hl=en to find out more about Google Drive in full detail. 

With Google Drive, you get a generous 15GB of free storage for any types of file(s) you'd like to access. In addition, creating and using Google Docs, do not count against your 15GB limit. Now lets say, you start using Google Drive a lot, and you need more space. No problem, they offer additional cloud storage tiers for very reasonable prices; the best I've seen on the web actually. As of today's date, you can get 100GB for $4.99 a month up to 16TB for $800 a month, now that's going way overboard for cloud storage for about 99.9% of the population, but you get the point. 

Adobe Introduces Great Deal on Photoshop CC & Lightroom for Photographers | South Bend Commercial Photography

Earlier today, during the Keynote speech at the Photoshop World conference in Las Vegas, Adobe showcased some innovative new tools for creatives; highlighting the Creative Cloud as supreme ruler and the future of Adobe Systems. Adobe showcased some new features in Photoshop CC, and also emphasized the importance of the Creative Cloud and keyed in on the future photographers workflow in an increasingly connected world. Tom Fogarty, Senior Product Manager of Lightroom, demonstrated the vision of future Adobe photography products, stating the the photographers workflow today is becoming fragmented as it once was in the past. Adobe is hoping to change that by bringing advanced digital imaging technology to mobile devices. These products and services will be available in the distant future. 


"Since introducing Photoshop CC, we’ve listened to feedback from a spectrum of our customers, from advanced professionals to casual enthusiasts. One common request was a solution specifically tailored for photographers. We listened, and at Photoshop World we’re announcing a special offer for our loyal Photoshop customers. Beginning today, customers who own Photoshop CS3 or higher are eligible for a special Creative Cloud membership offer that includes all of the following for just $9.99/month:

• Photoshop CC
• Lightroom 5
• 20 GB of online storage
• Behance ProSite ($99 alone)

• Access to Creative Cloud Learn’s training resources


To be clear, $9.99 is not an introductory price. It is the price for those of you who sign up by December 31, 2013. This offer will be available at the same time we introduce the new version of Lightroom 5.2 in a couple weeks.  Visit the FAQ to learn more and follow Photoshop on FacebookTwitter to find out when the offer goes live.

To reiterate: the intention is not to get you in at $9.99/mo., then crank up the price after a year. $9.99 is the expected ongoing price.

I know that this change won’t address every concern, but I’m happy that the offer makes it much easier for photographers who want just two Adobe apps to get the benefits of Photoshop CC & the Creative Cloud. As time goes by the cloud component will grow more & more valuable, and I’m excited that more people will be able to get new capabilities the moment they’re available." -http://blogs.adobe.com/jnack/2013/09/photographers-a-great-new-deal-on-photoshop-cc-lightroom.html

If you missed the keynote speech earlier today, you can watch it at www.photoshopworld.com/live . It should be posted within the next 24hrs. 

Meeting Scott Kelby - The Godfather of Photoshop

Brian Rodgers Jr. and Scott Kelby at his "Shoot Like a Pro Seminar" - Chicago 2013

Meeting Scott Kelby - The Godfather of Photoshop

This is actually my second encounter talking with Scott. I first met him at one of his live seminars in Indianapolis back in 2011. This snapshot was taken at his Shoot Like a Pro seminar in Chicago this year. Scott is definitely one of the most sincere, hilarious, and inspiring people I have met in my life. Scott redefined education for me. He opened my eyes and really showed me how fun it is to learn. In my opinion, he is living proof of the American Dream; that working hard, loving what you do, and treating people right can lead to great things in your life. Upon accomplishing all the things he has accomplished, he remains an extremely humble man; which is very respectable. 

Always cool talking with Scott. He has taught me things far beyond my Photoshop skills. If you ever get a chance to see one of his live seminars, DO IT! Thanks Scott :)